
A while back, I worked on a landing page with a blog section. Two major constraints came up:
-
Easily integrate this section into an existing Next.js project,
-
Allow anyone to add articles without writing a single line of code.
After several rounds of research and testing, I ultimately chose the Outstatic library.
What is Outstatic?
Outstatic is an open-source CMS (Content Management System) designed for developers using Next.js. But unlike traditional CMS platforms like WordPress, it has several interesting features:
-
No database: Outstatic works solely with Markdown files saved in your GitHub repository. No need to manage a database — everything is simple and fast.
-
Hosted directly in the project: Outstatic integrates directly into your Next.js project. No external service or separate deployment needed.
-
Intuitive user interface: Once configured, anyone (even without technical knowledge) can create articles or pages through an admin interface.
Pros and Cons
Before showing you the library in action, here are what I consider to be some pros and cons of this library compared to more traditional CMS solutions.
Pros
-
Simplicity and speed: In just a few minutes, you get a functional blog.
-
Self-hosted: Everything stays in your project, no external dependencies.
-
Draft management: Flexible enough to publish your articles at the right time.
-
No database: Perfect for static projects.
Cons
-
GitHub dependency: Outstatic requires a GitHub connection, so every contributor must have an account and be added to the organization. It’s not possible to use Outstatic with other version control solutions. Additionally, this can be problematic in some companies for non-technical team members.
-
Complex collaboration: If you’re working with an organization, this requires an OAuth configuration.
-
Not suitable for large data volumes: When article files stored in your Git repository become too numerous, it can lead to decreased performance on your site.
How to Configure Outstatic?
Setting up Outstatic on your project is very simple — it only takes 3 steps:
Step 1: Install Outstatic
Add Outstatic to your project by running:
npm install outstaticStep 2: Create an OAuth App on GitHub
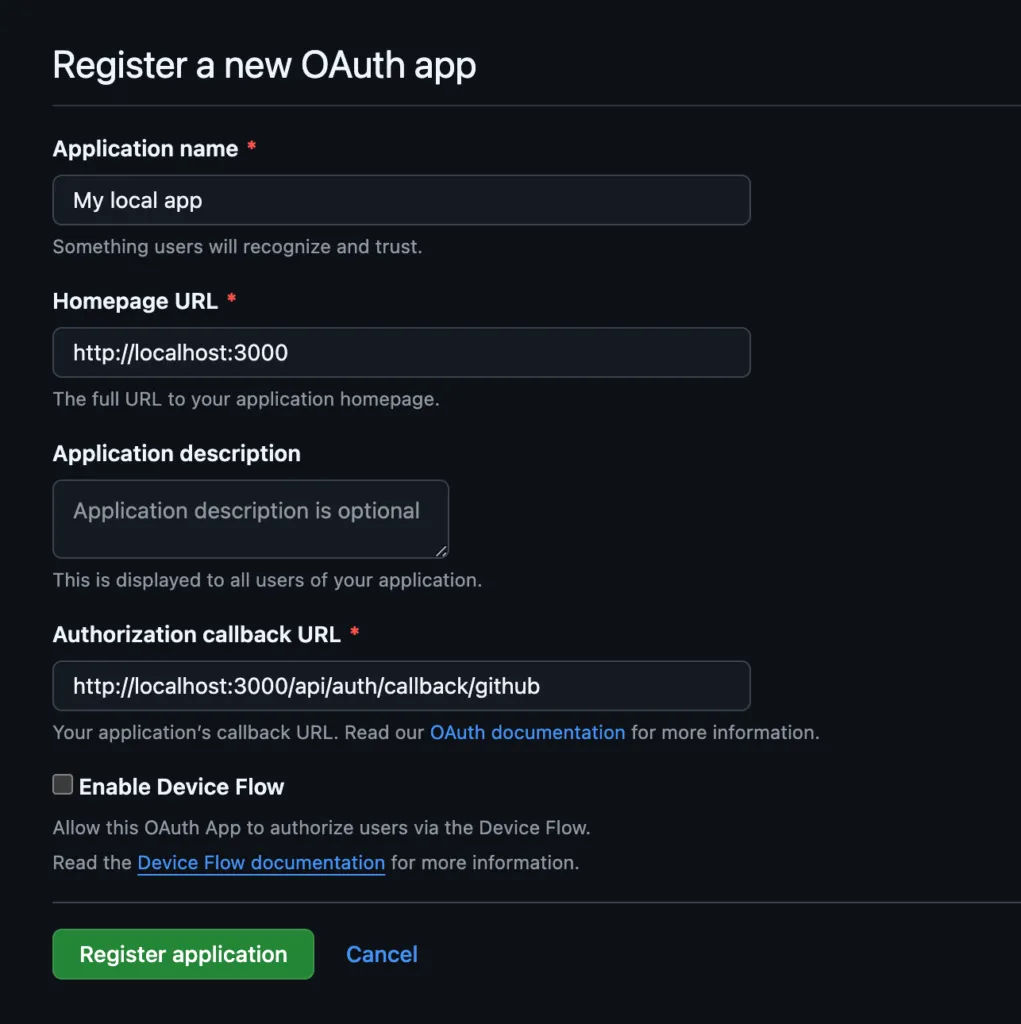
Outstatic uses GitHub for authentication and article management. Here’s how to create an OAuth app:
-
Go to GitHub Developer Settings.
-
Click on New OAuth App.
-
Fill in the fields:
- Application name
- Homepage URL: Your site’s URL (for example,
http://localhost:3000locally). - Authorization callback URL: Add
/api/auth/callback/githubto your URL (for example,http://localhost:3000/api/auth/callback/github).
-
Once the app is created, note your client ID and client secret.
Step 3: Integrate Outstatic into Your Project:
- Create a .env file with the previously retrieved variables.
OST_GITHUB_ID=YOUR_GITHUB_OAUTH_APP_ID
OST_GITHUB_SECRET=YOUR_GITHUB_OAUTH_APP_SECRET

# OST_REPO_SLUG
# The name of your repository on GitHub without the username
OST_REPO_SLUG=YOUR_GITHUB_REPOSITORY_SLUG

# OPTIONAL
# If empty this will default to your GitHub username
OST_REPO_OWNER=YOUR_GITHUB_USERNAME

# OPTIONAL
# If empty this will default to main
OST_REPO_BRANCH=YOUR_GITHUB_REPOSITORY_BRANCH- By following the official Outstatic documentation, it will be very easy to configure the remaining elements: layout, admin page, and API.
How to Add Content?
Creating a Collection
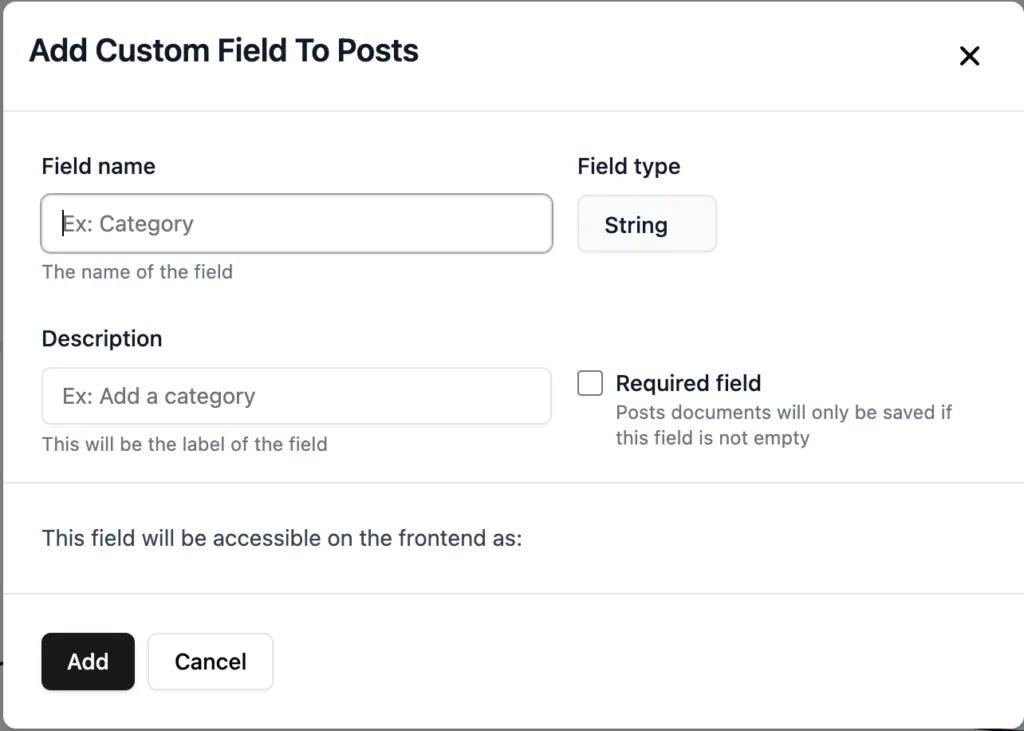
From the interface, you can create a collection: for example, for a blog you would create an “Articles” collection that will contain all your articles. By default, each collection item has a title, description, image, author, etc., but you can also create custom fields. Once the article is created, it is saved in your GitHub repository as a Markdown file in the defined folder (content by default).
Viewing and Retrieving Articles:
To retrieve your Markdown articles, use the methods provided by Outstatic: getDocuments or getDocumentBySlug. Then convert the content to HTML to style it.
const posts = getDocuments('articles', ['title', 'slug']);

const post = getDocumentBySlug('articles', slug, [
  'title',
  'publishedAt',
  'slug',
  'author',
  'content',
  'coverImage',
]);
How to Style the Article?
In my case, I chose to use Tailwind CSS and specifically Tailwind Typography to handle the styling of Markdown articles: you can customize your articles as you wish, by modifying the style of headings, images, etc.
<article className="prose prose-lg prose-h2:font-semibold prose-img:rounded-lg">
<header>
<h1>{data.title}</h1>
<p>
Published on {data.date} by {data.author}
</p>
</header>
<section>{content}</section>
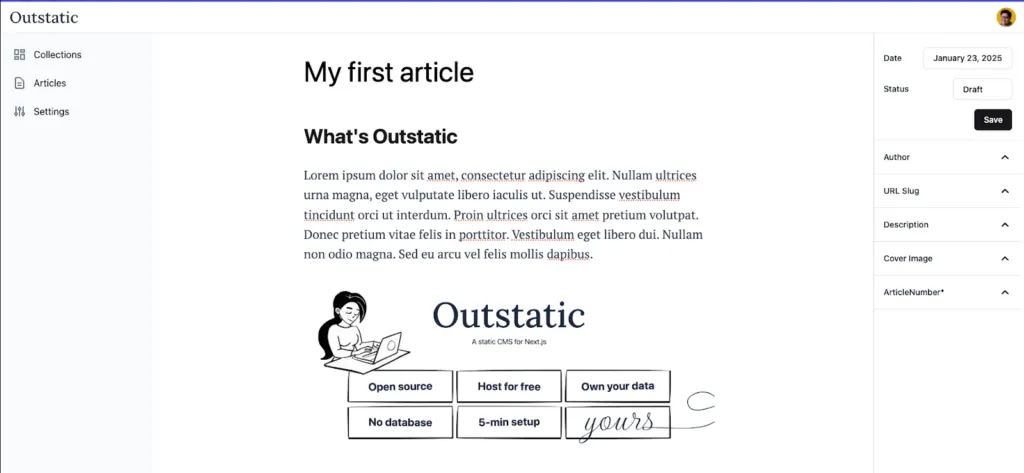
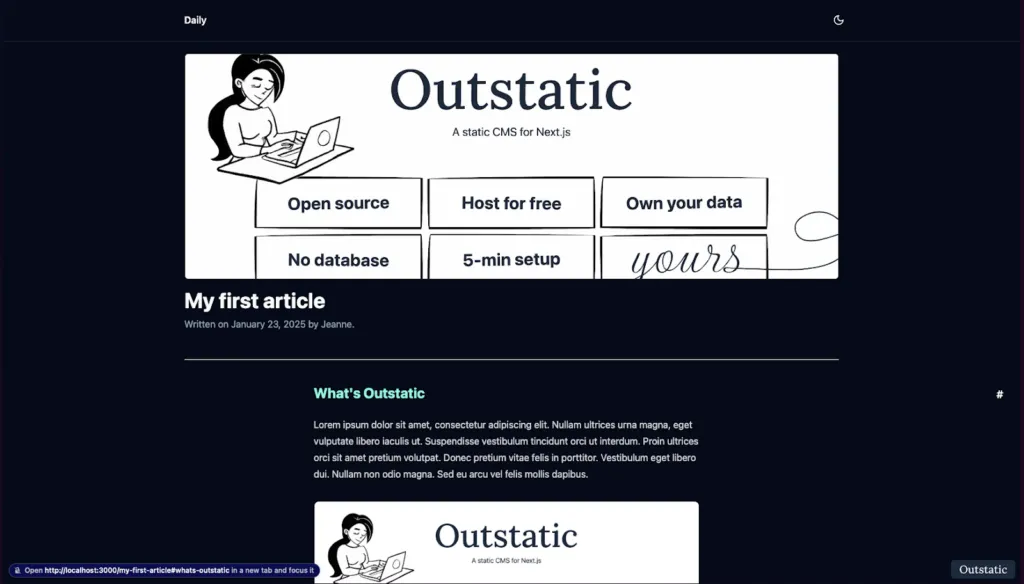
</article>Writing an Article with Outstatic VS the Result on the Site
When you write an article on the admin interface, the style is not the same as on the page where you’ll display the article for your users. Here for example is the Outstatic interface in the first image — this is where you write the article, fill in its title, description, etc. In the second image, I’ve added styling and used the “title”, “author”, and “cover image” properties to create the article header.
My Opinion on Outstatic
In the past, I’ve had the opportunity to use WordPress for several projects, whether in a professional, personal, or academic context. While this tool remains a reference for creating websites and blogs, it does impose certain constraints in terms of customization. Generally, you choose a predefined theme to structure the display of articles, which limits flexibility and integration within a more complex project.
With Outstatic, the approach is quite different. This tool offers fully customizable content management, allowing you not only to structure articles according to your own needs but also to integrate it directly into an existing website. It thus becomes possible to benefit from a lightweight and modular content management solution without having to depend on a heavy ecosystem like WordPress.
In conclusion, Outstatic is a simple and effective solution for adding a blog section to a Next.js site. It’s a perfect tool for projects where content management needs to be fast and accessible, without sacrificing control over the code.
Author: Jeanne Grenet